It is possible to create empty view and controllers independently, and write the needed code into them, but we are going to use a really cool feature of Visual Studio, 'Scaffolding'. We will tell it to create a CRUD for our Person table.
So, what is a CRUD? Create, Read, Update and Delete. We will get five views created for us:
- Index, a list of all records. This is the default view if no view is specified in the URL.
- Create, a form for creating a new record.
- Details, a form for viewing the details of one record.
- Edit, a form for editing an existing record.
- Delete, a form for deleting one record.
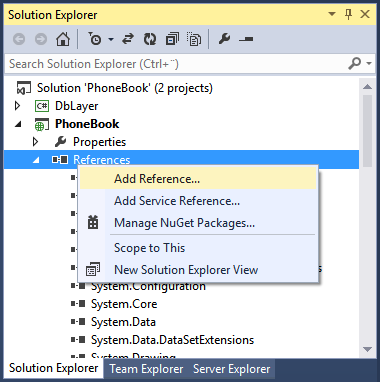
Before we can do all this magic, we have to tell the project PhoneBook how to find the DbLayer project. Right-click the 'References' node, and select 'Add Reference':
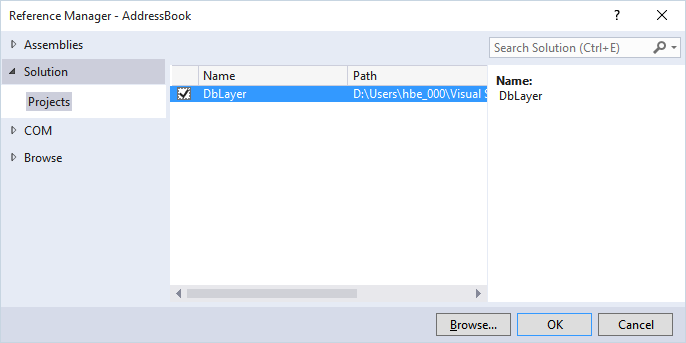
The Reference Manager opens. Here you can add references from four different sources, assemblies in the GAC (Global Assembly Cache, a place where Windows stores dll files), the current solution, from COM (Common Object Model a standard for defining objects) libraries and by browsing for dll files. We have the DbLayer in our solution, so we select 'Solution' and check the DbLayer file:
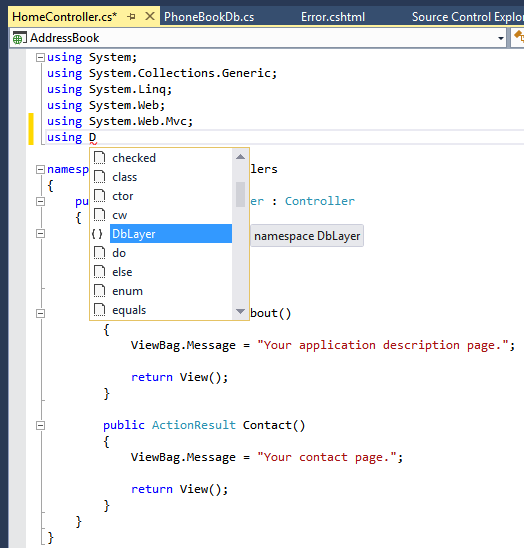
We can now see that the PhoneBook project can use the DbLayer project by the fact that we can add a 'using' clause for it:
...and that we can use the entries in the Model:
But we will not start using the database from the Home view, so delete the code added above (the 'using' clause and the DbLayer object, if you actually added them).
Instead, we will create a new folder with a new set of views, and a new controller.
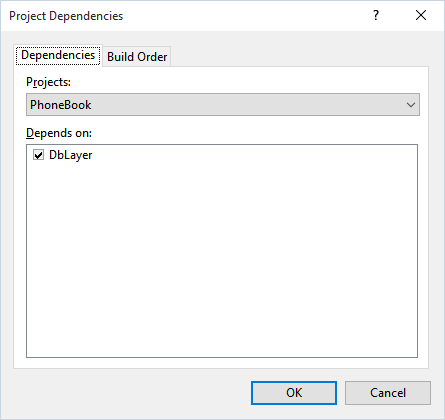
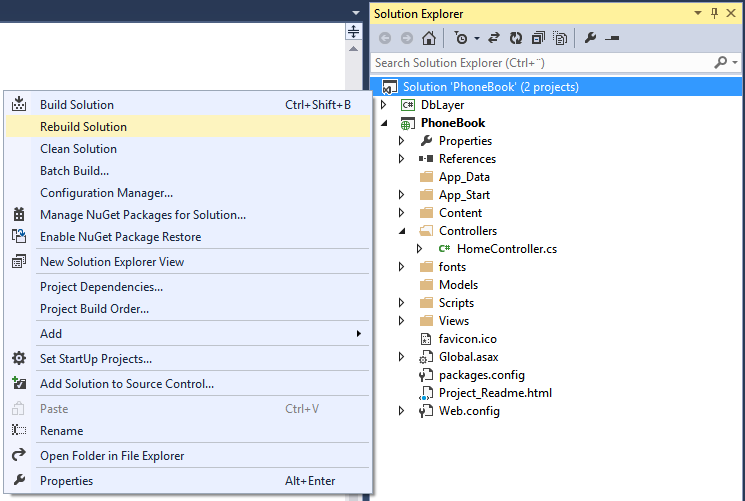
But before we do that, let us take a quick look at the build dependencies. Note that if we do any changes to the DbLayer project, and then build the PhoneBook project, the DbLayer project must be compiled first, right? This should be done per automatics, but let us see if it is done. Right-click the solution node and select 'Project Dependencies' (or 'Project Build Order') to open the 'Project Dependencies' dialog:
Here you can verify that the PhoneBook depends on the DbLayer project and under the 'Build Order' tab you will see that the DbLayer project will be built first:
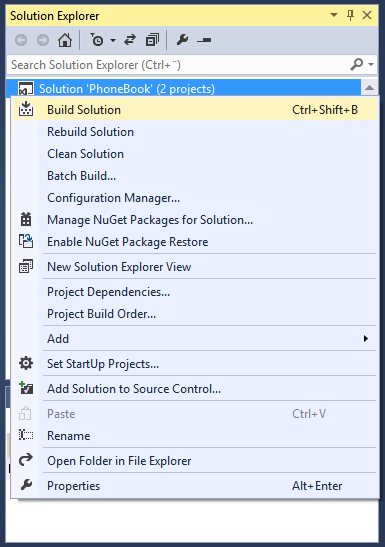
Before we can use the automatic controller and views generation, we need to build both projects. You can do that by right-clicking the solutions node and select 'Build Solution':
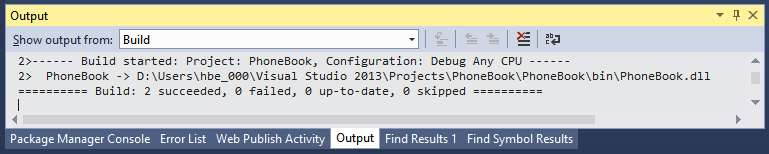
Hopefully you will see this in the Output list:
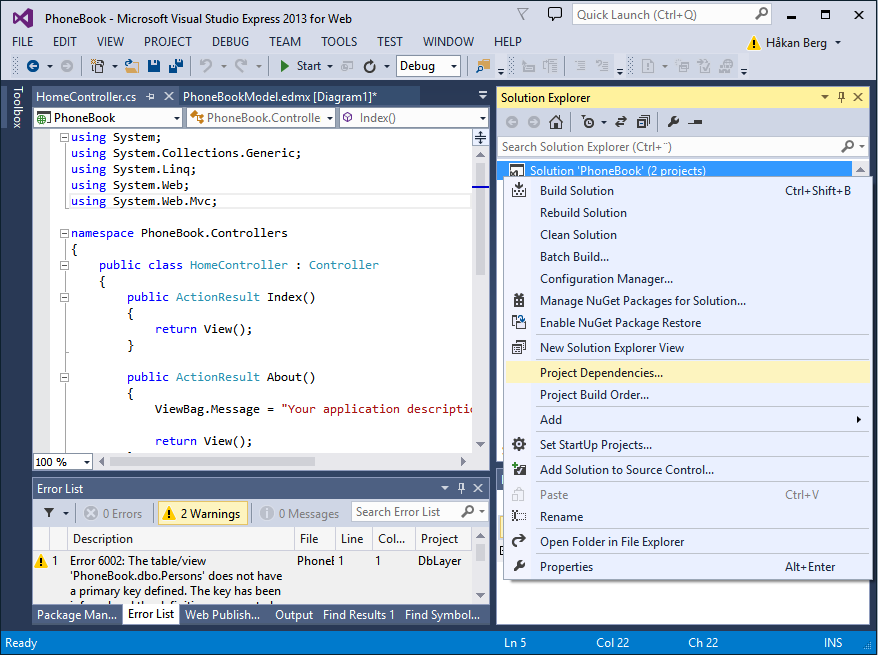
If you go to the Error List you will still see the two warnings about indexes, but never mind that, we will fix it.
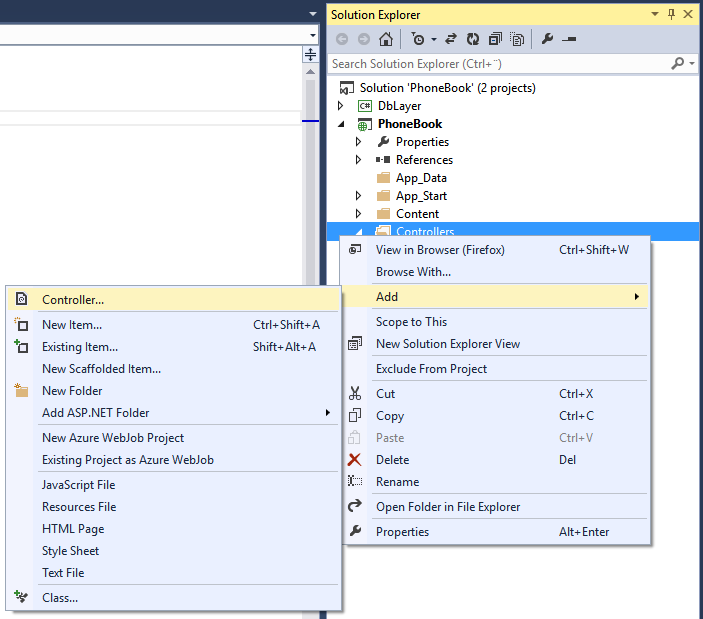
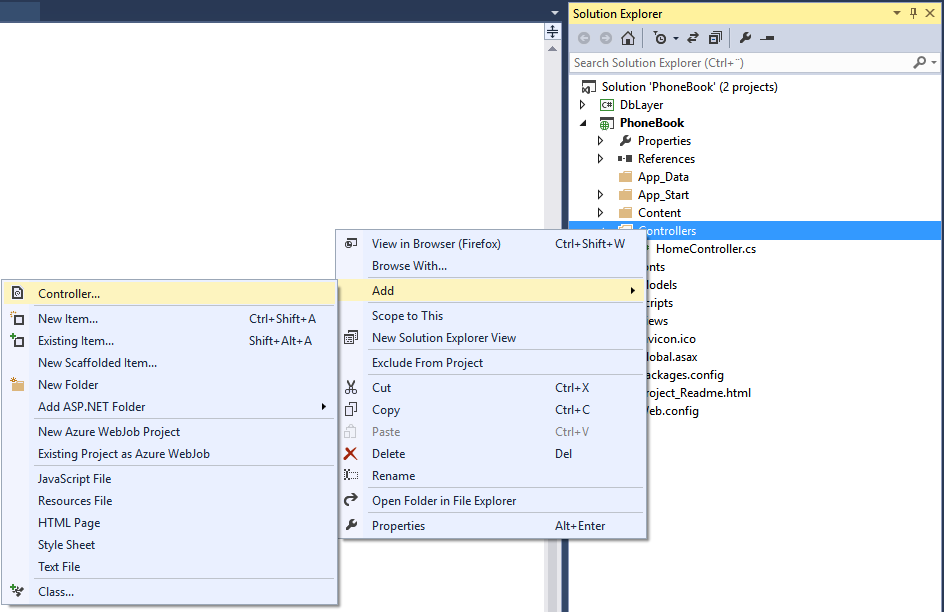
Now we can create the new files. Start by right-clicking the Controllers folder in the PhoneBook project, select 'Add' and 'Controller...':
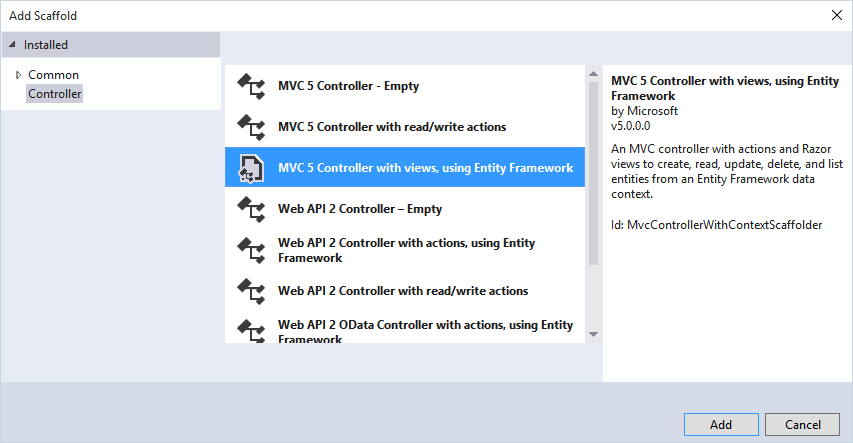
As you can see, it is also possible to create an empty controller, and a controller with the actions only, but we want a controller with 'everything on it' so we select 'MVC 5 Controller with views, using Entity Framework':
If you have some other version you will see another digit after MVC, but don't worry, it will probably work as well, you will only see difference between your project an the one in this course.
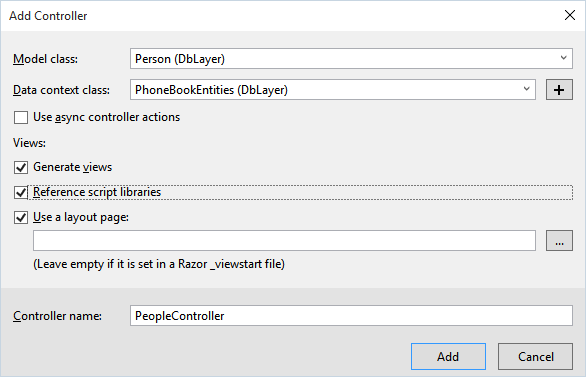
In the 'Add Controller' dialog we select the model class that describes the Person table, and 'PhoneBookEntities (DbLayer)' data context class we created for our DbLayer project. The controller should be named as the table name concatenated with the word 'Controller'. By using a layout page that we do not specify, we will have our views embedded in the same file as the views under the 'Home' folder, namely the file ..\Views\Shared\_layout.cshtml. This is very useful since it lets you have the same header and footer in all views you like, together with all needed style sheets and script files.
Now, click the 'Add' button and...
Yikes! Darn! What happened here? Ok, maybe I should read the message...
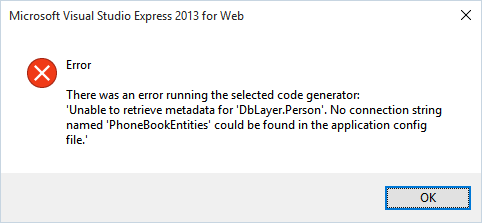
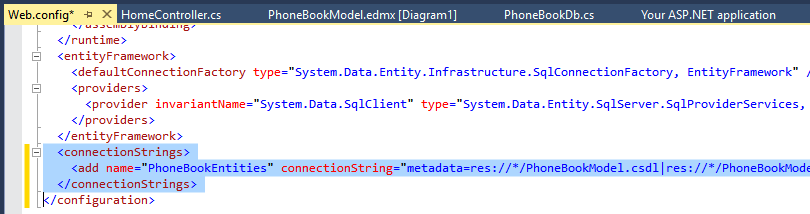
Ok, it cannot find a connection string. But wait, wasn't it created for us when we added the model to DbLayer? It should be in the file App.config. But that file is in the DbLayer project. And now we are working in the PhoneBook project, which does not even have such a file.
But it has. It's just that it is called Web.config rather than App.config, why? Because this is a web project. So, what we need to do is to copy the connection string from App.config to Web.config. Andnot just the connection string. Make sure to keep the hierarchical position in the file, and include the connectionstrings node:

Easiest way to do that is to place it direct after the opening or direct before the closing <configuration> tag. Here I put it last, just before the closing tag:
Now, let's try this again:
...and:
...and if you remember:

...and the last step:

Yes!
We have a new controller 'PeopleController' and a new folder 'People' with five view files in it:
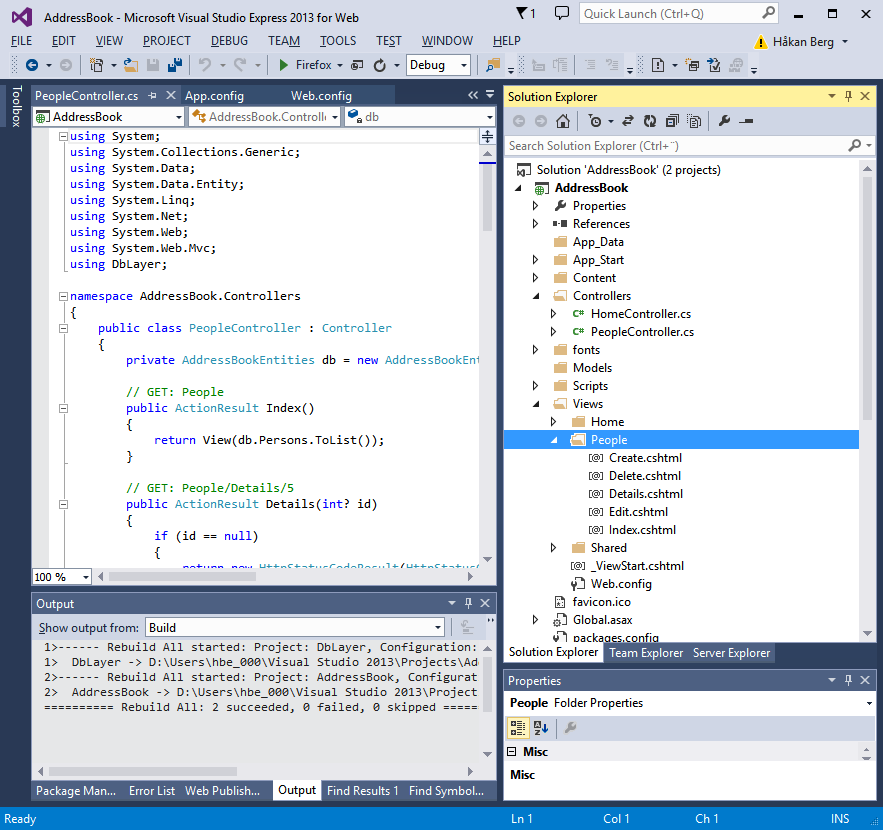
Note that the files already have all neccesary code to make it work.
So, what happens when we press F5? We see the same thing as before:
What we want to see is our new views, but we have no link to get there. We will create that later, but for now, just add 'People' at the end of the link in order to get to the 'Index' page (that is the default one, remember?):
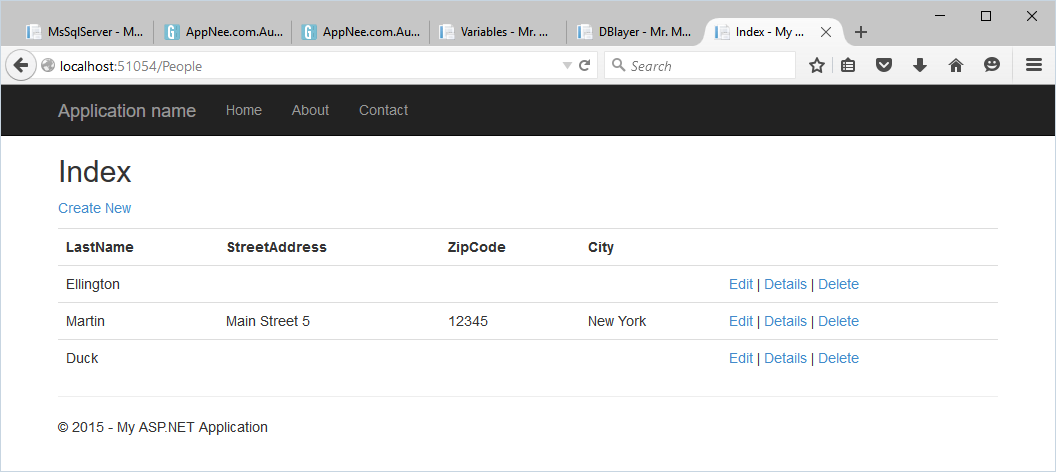
That looks better. And all works. Play around with it and see for yourself. Add, edit and delete records and, and...
Wait a minute! Where is the first name? And the Edit | Detail | Delete links does not work! No sweat. I know why, and I know how to solve it.
Let us take a look at that in the next chapter.