Console programs
Variables »
What you see above is actually the image on the front-page of my first programmers course I wrote for swedish young aspirants. The course was C/C++, not C#, which was not invented by the time. Still, I like this picture, and since we are going to do programming for the console, it is ok for this course.
The reason I start you out doing console programs is that we are going to concentrate on the language C#, not Windows API. We will concentrate on how to use C# to build logics without messing with any API. In essence we will almost only use the API 'System.Console' which contains functions for reading and writing from and to the console.
Maybe you noticed that the menu buttons got a new sibling to the right, 'Lessons'. This is where you find all lessons connected to the current course, in this case the Console course.
If you have not yet installed "Visual Studio for desktop" you should go to Tips'n tricks´n other stuff -> Program installations -> Visual Studio and follow the instructions.
Let's start by creating a console program. A console program is a program that runs on a console only. The console we have on our Windows computer is the command prompt. You normally start it from the start button by typing 'cmd'. There has been console programs for a long time, long before the operating system Windows, and even personal computers, existed. Like the electro-mechanical type-writer I mention in the chapter 'Bits and bytes and stuff'.
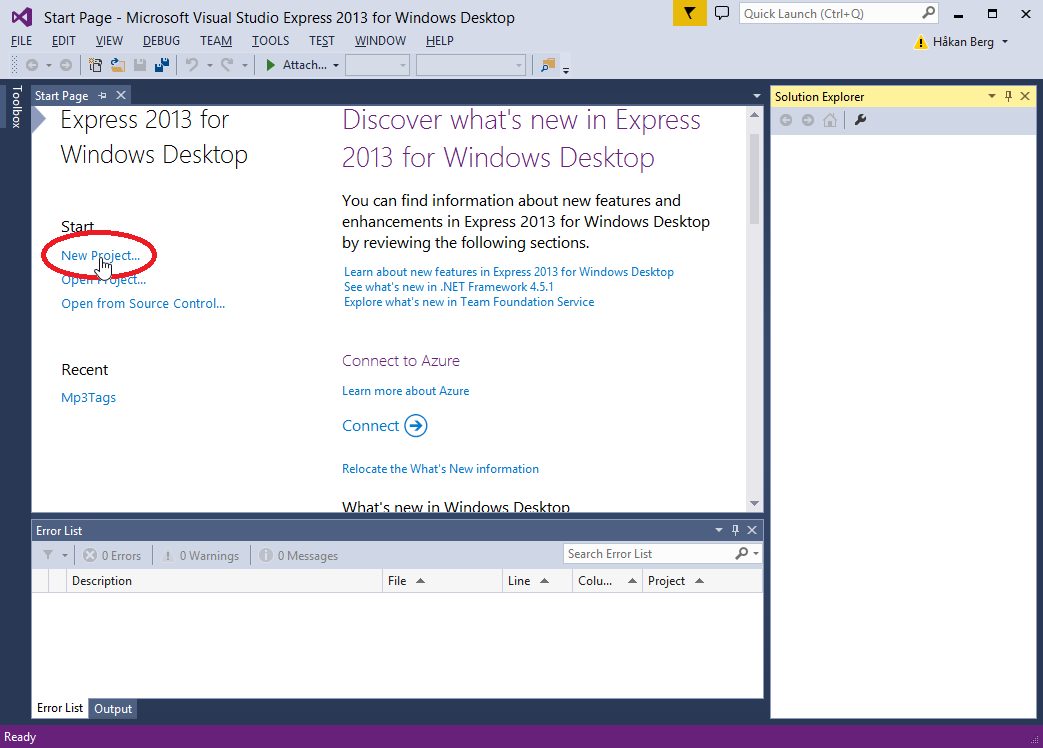
Start your version of Visual Studio for Desktop. When started you'll see the start-page where you can create a new project. If you already started Visual Sudio and closed the start-page, you can re-open it from the View menu where you find Start page.
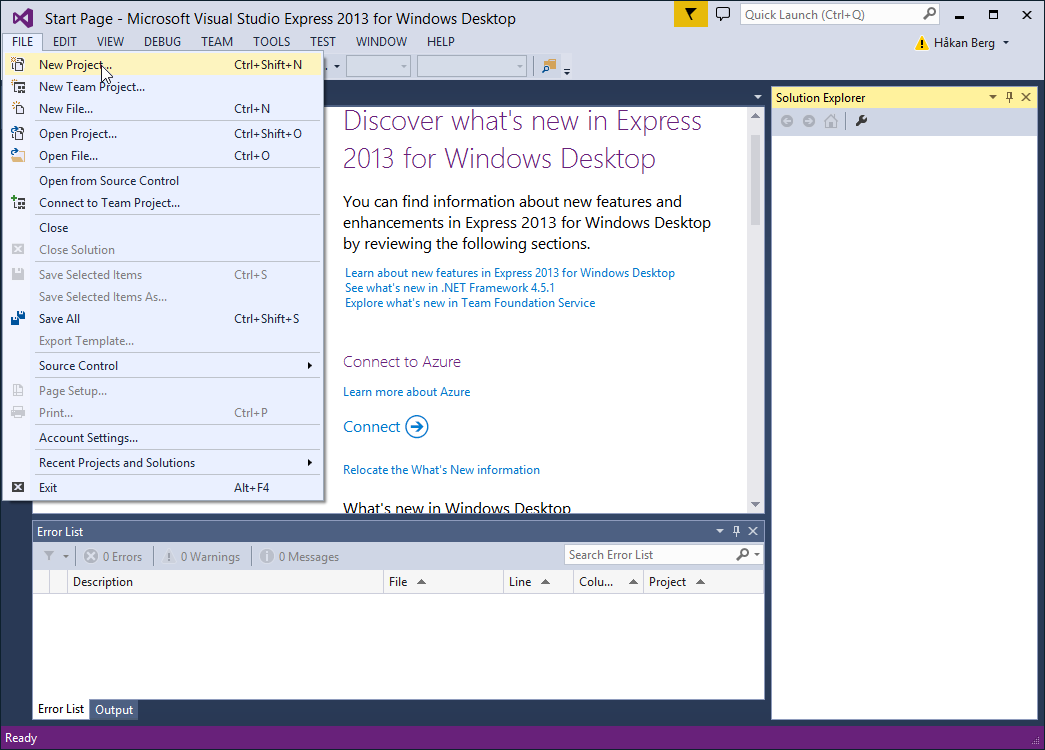
You can also start from the File menu, regardless of whether you have the start-page open or not:
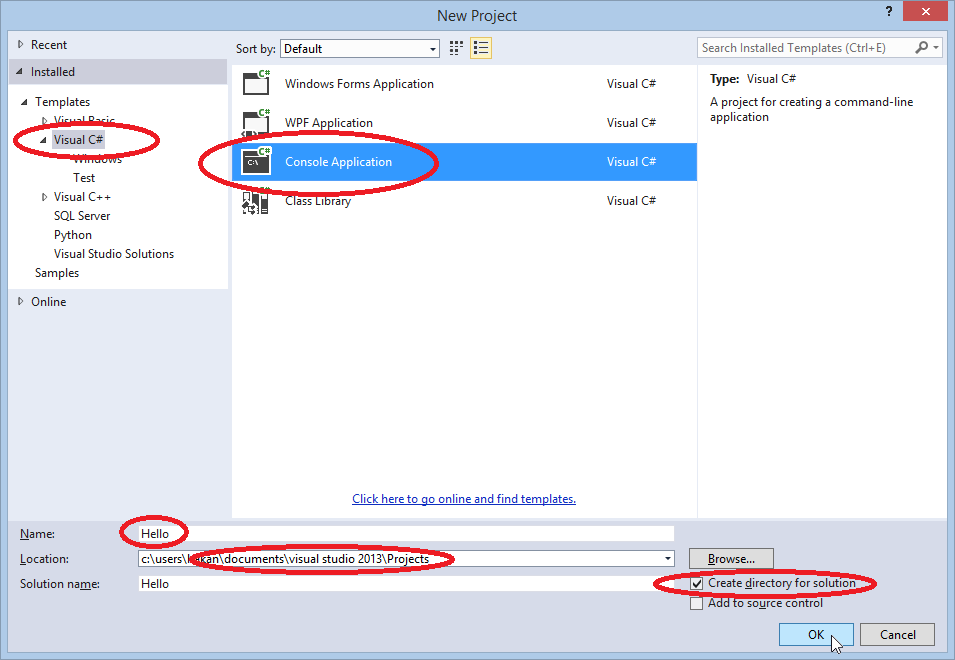
In the 'New Project' dialog you can see that there are different languages to select from and different types of projects. There is also a possibility to download more templates from the web (Online). Do the following selections:
- Visual C#
- Console Application
- Select location (if you do not like the default).
- Type a name. 'Hello' is all right for this tutorial.
- Check the box 'Create directory for solution.
- When all is done, click 'OK'.
Below we can see the result:
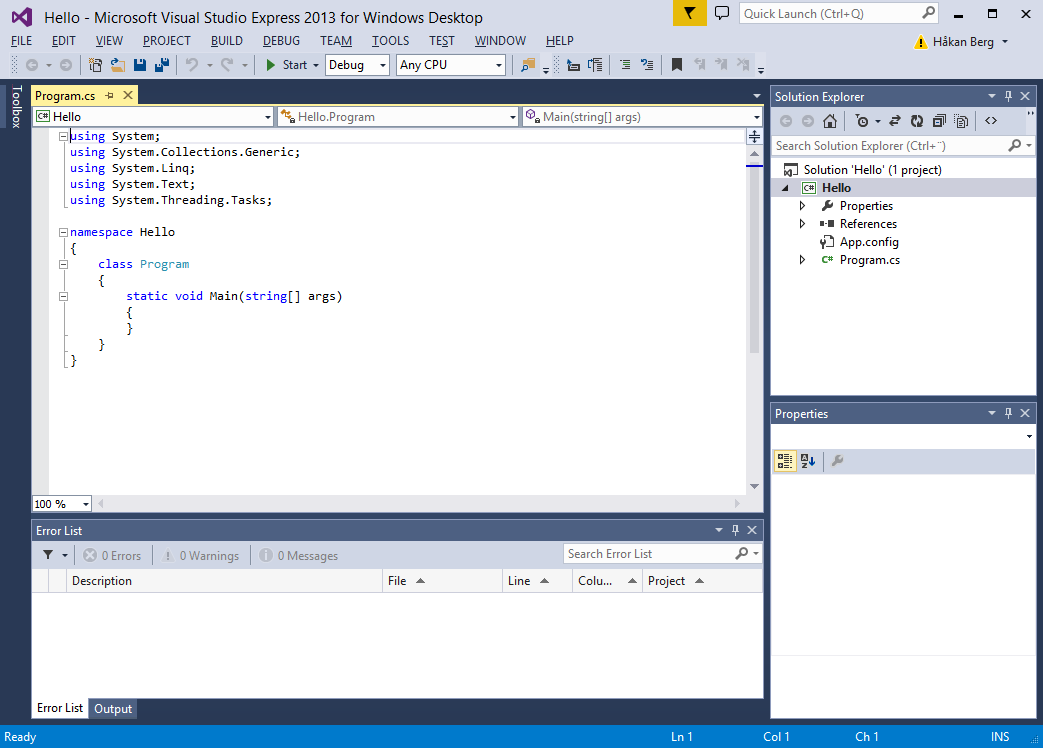
So, what did we really get here and why did we have to tell Visual Studio what type of program we wanted to write?
The project!
We are going to write a small program, so that would be a one file thing, right? Wrong! Most programs are written in more than one source file, but even in this case we need more than just a file for our source. Visual studio has created a folder-structure and populated it with more than one file:

|
Hello.sln is a solution file. For a specific solution we often need more than one program. Also, it is common practice to
put parts of a program in a kind of module, that could be used by more than one program. Do it once and never repeat your code,
is the idea. The solution is like an umbrella under which you can collect programs that you feel belong together. You can
open the .sln file with any text-editor to see what it contains, but do not alter it. Hello.v12.suo is a binary version
of the solution file and it also contains a lot of configuration for the tools you have in Visual Studio I't good practice to separate code from data. Here we can see a file named App.config where you can store important strings etc. We will be using its counterpart Web.config when we do web programming. Hello.csproj contains configuration describing how your program will be built. I will talk a bout that in a moment. Program.cs is your sourcecode file. That's the one that is open in the picture above, the one you will be writing your program in. There are some foders for storing binary files created when you build your program, bin and obj. They contain sub-folders Debug, and will later also contain folders Release. I will talk more about that later. |
Finally we see a Properties folder containing a file AssemblyInfo.cs. It contains information about your program, like name, version, copy-right and a globally unique string, a GUID, that identifies your program. No other program in the world will have the same string.
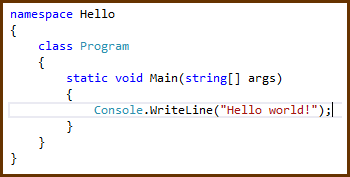
Before I explain more here, I know you must be anxious to start programming, so let's insert our first line of code. Alter the program by adding one line, like this:
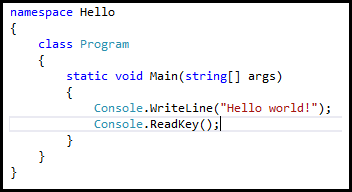
Hit F5 and observe what happens. Did you see the console window flicker? The program ran, but the console window was closed immediately. That is because hitting F5 tells Visual Studio to run the program for us. In order to do that it first has to open a console window, but when the program finishes, Visual Studio closes the window, just like that. This is a normal behaviour, but not very useful for us when developing the program. We could work around that by inserting a program line that waits for something to happen. Let us simply wait for a key-press. Add another line like this:
Now hit F5 again and see what happens!
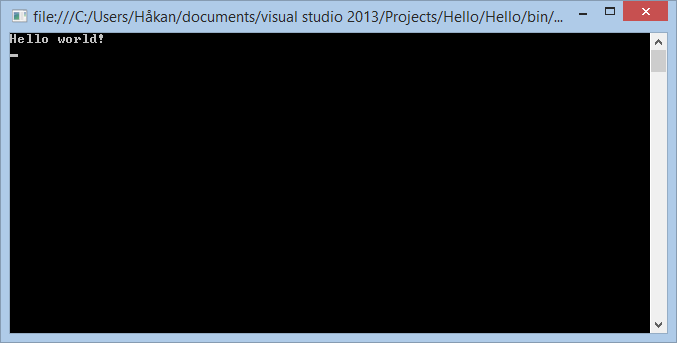
You have successfully written your first program and it runs perfectly! Now, hit any key to terminate the program and close the command prompt.
What happens when you build?
When you 'build' your program a few things is being done. First of all your program is translated into machine-code. That is called 'compiling'. But as I mentioned before, it is not translated to machine-code that writes the text on the console. It stores the text in memory and then creates machine-code that calls a function in the API 'System.Console' supplying the address in memory where the text is located. The function in the API is called WriteLine(). It contains machine-code that makes a call to a function in BIOS (that will be an 'INT' operation, for the curious) after having set some register to address the part in memory where we said the text was located. Complicated? Never mind. You only have to understand that your final program will concist of code from your compiled C# program combined with code from the API.This combining of machine-code objects is called 'linking'. Linking is beeing done with another program, a 'linker'. So, in essence, you program is first compiled into machine-code that cannot run by itself. It is called 'object-code' since it is an object containing code. The API also contains objects, of which we need two, the WriteLine object and the ReadKey object. Your object is put in one of the obj the folders. The linker knows where the other two are stored.
Do you see now why you need a project file? Without it, Visual Studio would not know what to do, that it should use the compiler on your C# code and the linker to put the three modules together into an executable file. By the way, the executable file is stored in one of the folders 'debug' and 'release', under the bin folder, depending of the type of build you are doing.
An one final thing, why 'debug' and 'release' folders under obj and bin? Well, those are there to store 'debug' version and 'release' version of the result respectively. So, what is the difference between 'debug' and 'release'?
If you look at the Visual Studio tool bar you will find a selector which lets you select between Debug and Release. If you leave it as it is, i.e. Debug, the build will insert extra information into the executable file which will help the debugger to correlate machine-code with your source-code. That makes it possible to debug your code.
Let us try out the debugger. There are some keyboard buttons for debugging, and let's start with a few of them:
| F5 | Starts or resumes the program in debug mode. If you have not built the latest version, build will be done first. |
| Ctrl + F5 | Same thing, but for release mode. |
| F9 | Toggles a breakpoint on the current line in your source-code. |
| F10 | Run one source-code instruction or function. |
| Ctrl + F10 | Run to current line. |
| F11 | Step into a function, if you are pausing on a function call. |
'Current line' is the line in the sourcecode editor where the cursor is. We will discuss functions later. A breakpoint is a marker in your source-code that makes a program running in debug mode stop at the line where you have the breakpoint. The instruction on that line is not executed. This gives you the opportunity to execute the line by pressing F10 or F11 and observe if the code on that line does what you expect it to do. If you have some variables, you may inspect their values before and after executing the line. More on variables in next lesson.
As you can see there are a few ways to start debugging: Set a breakpoint and press F5, press CTRL + F10 to run to current line or simply press F10 to start at the beginning of the program. Then you can step through the code by pressing F10 and/or F11 to observe it's behavoiur.
We will look more at debugging when we try a bit more advanced programming. For now, just observe that you have a solution explorer to the right, from where you can open files to edit.
Another useful thing to observe is that your project is a sub-item to your solution. As I mentioned earlier you can have more modules in the same solution. If you e.g. want to have a database involved, do not put it in your project. Create another project in your solution, and refer to it from your mein project.
Another useful pattern would be to create one solution for the exercises, just to have them under the same umbrella, your solution. Then you can create as many projects you want in the same solution. In order to select what program to start when you press E.g. F5, right-click on the project you want to run, and select 'Set as start-up project'.
Now maybe you want to do something more useful. Let's start looking at variables.