My first database
We will now start by creating a database, or, a 'schema' as the SQL proffessionals likes to call it. For this little project we are working on, the PhoneBook project, we want a database with two tables, one for the people, and one for their phones. We could of course do with only one table for personal data and phone number, but then a person could only be registered with one phone. A way to get around that would be to have more fields for phone numbers, e.g. Phone1, Phone2 etc. but that would be a clumsy solution.To break out the phones and put then in a separate table lets us enter any number of phones for a person. This is called 'Normalization' by the SQL people. In a database with many tables one could elect to do this for some tables, and leave other tables not normalized. In that case it is partly normalized. They therefore have this grading of normalization from normalization level one to normalization level 3. Level three is wher normalization is done everywhere that it is possible.
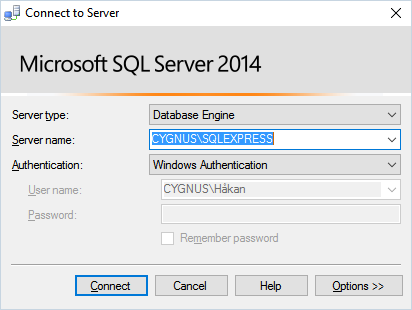
Now, start SQL Server Management Studio, select your database engine, and hit 'Connect':
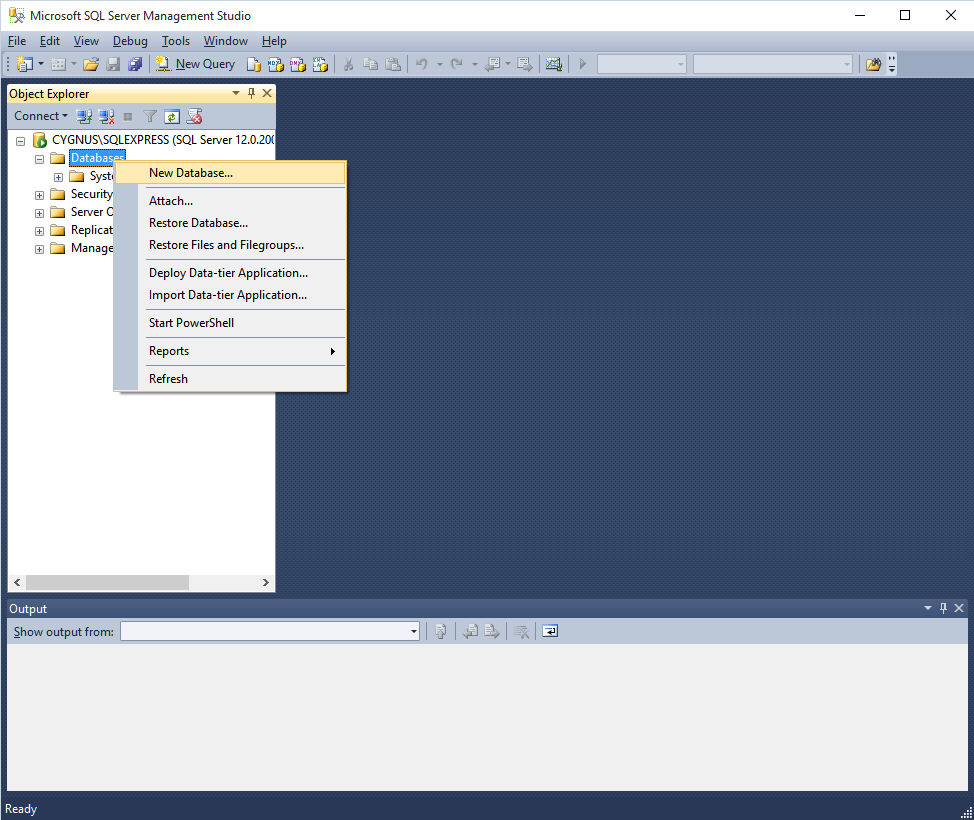
In the Management Studio, expand your database engine, right-click 'Databases' and select 'New Database...':
 A
A
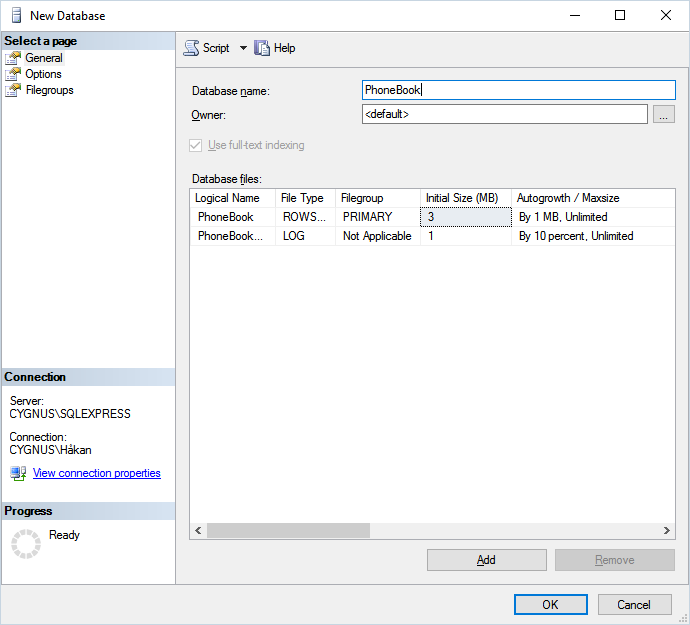
Give it a name, and leave the rest be, the default settings are ok for our project. Hit 'Ok'.
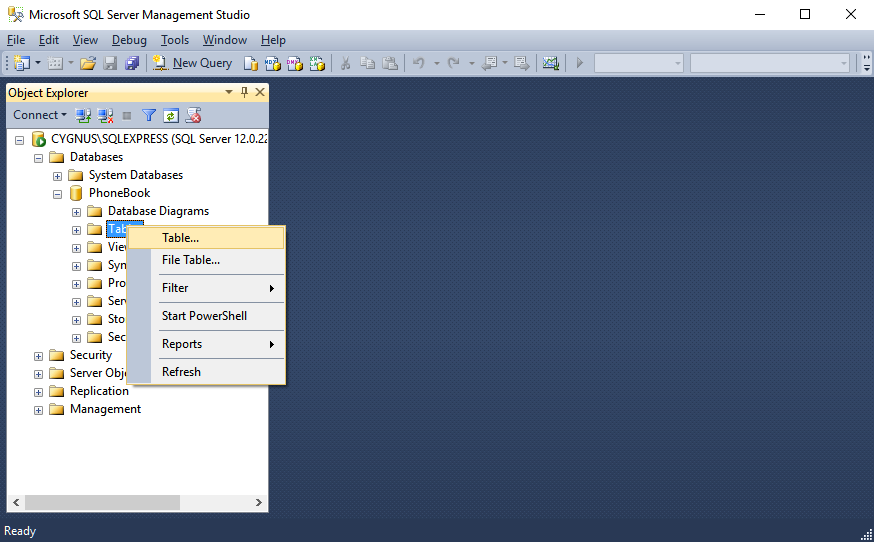
Right-click on 'Databases' in the tree-view, and select 'Refresh' in order to see your new database. Expand the database, right-click on 'Tables' and select 'Table...' (or 'New Table...' depending on SQL version):
We will now define the columns of the table. It is good practice to define a unique identifier, and we will need one for the Persons table. That will be the identifier that connects to the different phones a person owns. More about that in a moment. Name it 'Id', give it the type 'int', and uncheck 'Allow Null'.
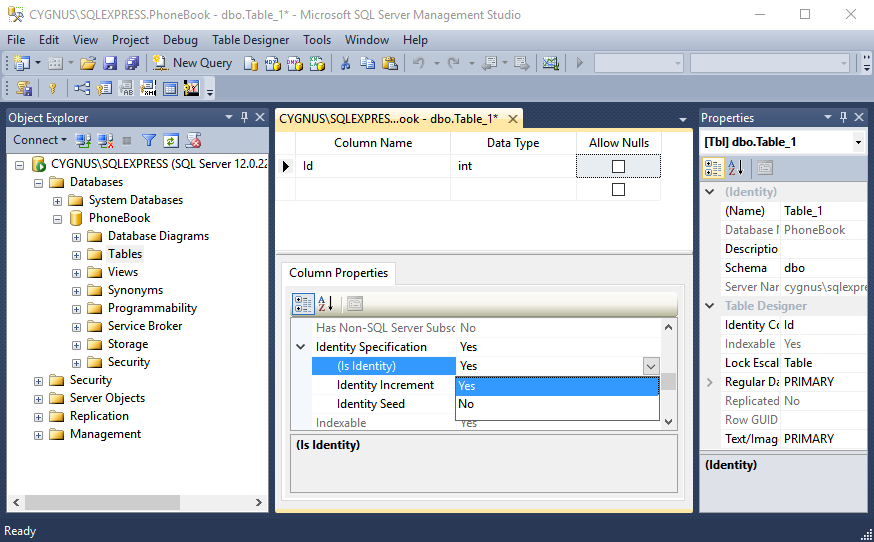
We would not force the user to enter a value for this identifier, and there is a way to have it managed automatically by SQL Server. Scroll down a bit in the 'Column Properties' part of the window to find 'Identity Specification'. Expand it to find '(Is Identity)', find a down-arrow to the right of that entry and click it. Select 'Yes' to make the column an identity column. The 'Identity Increment' part now automatically changes to 'Yes' as well. Now we have an automatically incremented identifier.
Fill out the other columns (each column is a row in this form, but don't let that confuse you) as shown in the picture below. Nvarchar(50) is a data-type that is for text and is dynamic in size up to 50 characters.
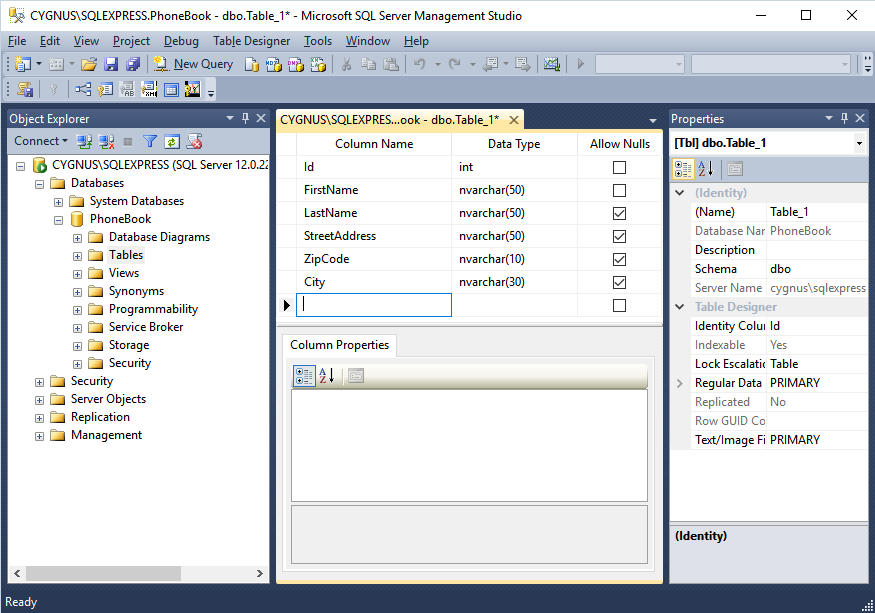
Save it by the name 'Persons'.
Also create a table for the phones:
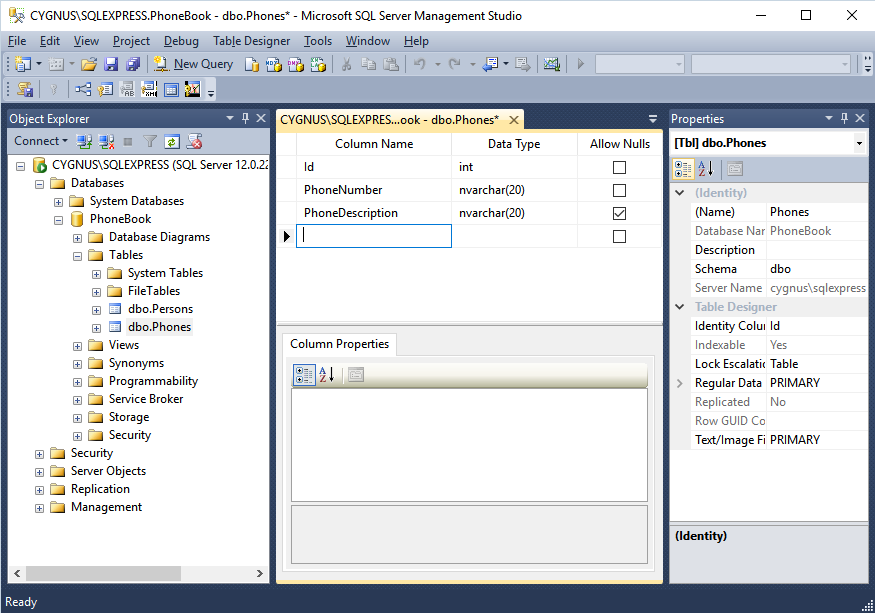
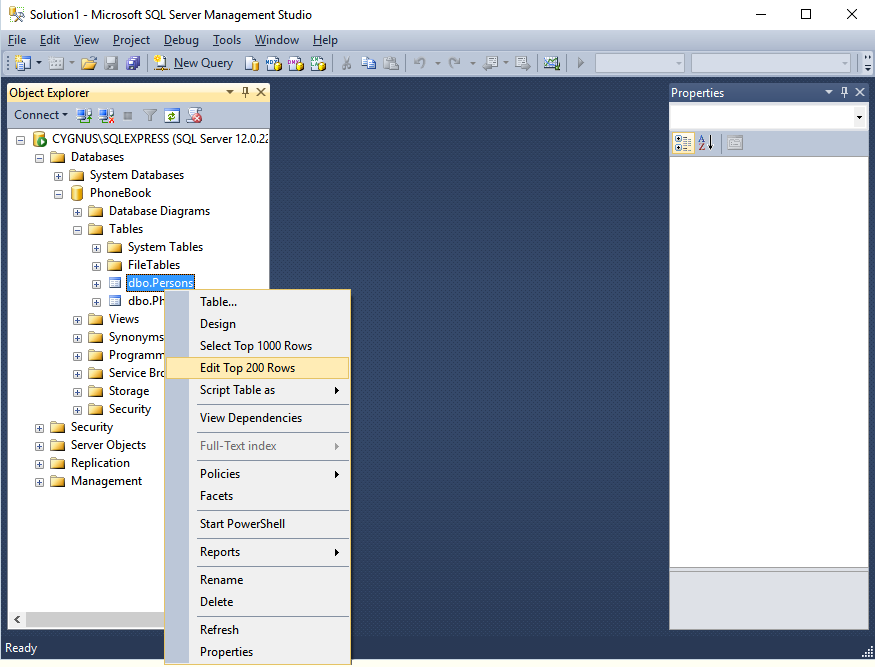
Right-click 'Tables' in the tree-view and select 'Refresh'. Then expand Tables and you can see your new tables. Right-click 'dbo.Persons' and select 'Edit Top 200 Rows':
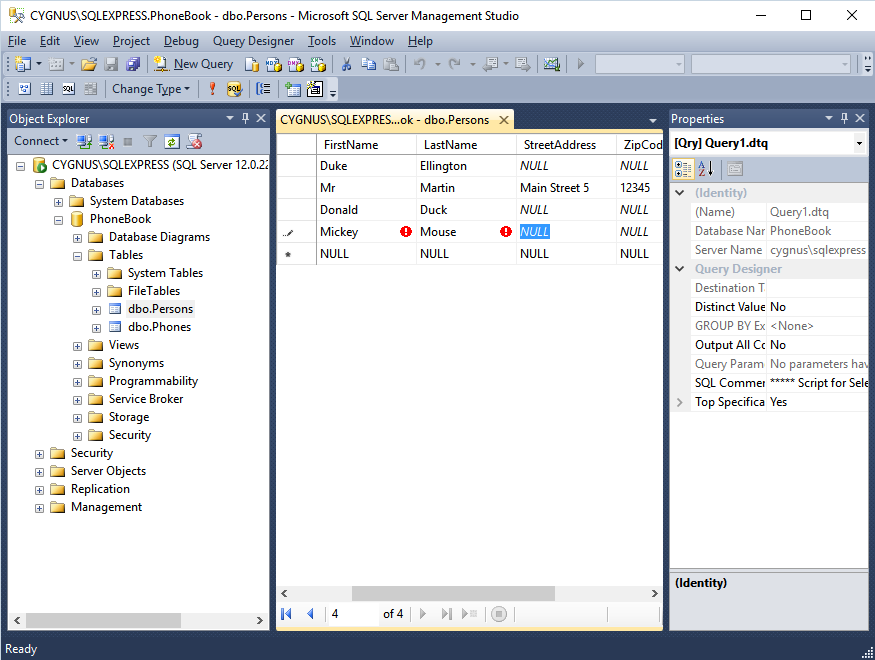
Fill out some data for a few persons. Note that data is stored when you leave a row. Before that all altered data is marked with an exclamation mark on a red circle to show that what you see is not the same as what is in the table. As you can see in the image below, it is ok to leave out data in the columns we left as 'Allow Nulls':
You might want to close the input part of the window. SQL Server Management Studio does not have a very clear way to identify the different tabs in the center part, the input part, where code and stuff is handled.
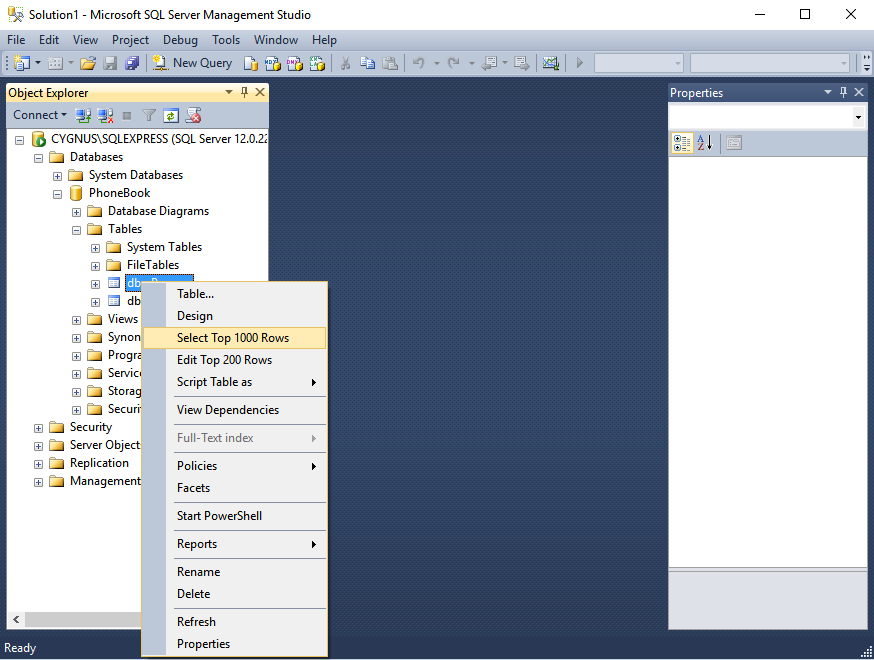
Let us take a look at our new data. Again right-click on the table but this time select 'Select Top 1000 Rows':
Now we got a window with two parts. At the top we can see the actual SQL command that selects up to 1000 rows from the table. You can edit the command if you know the Transact SQL Syntax. At the bottom we have the result. Pressing F5 or clicking the exclamation mark will re-run the query. You could try to enter a new line under the last one:
ORDER BY LastName DESC
and re-run the script. DESC is short for descending.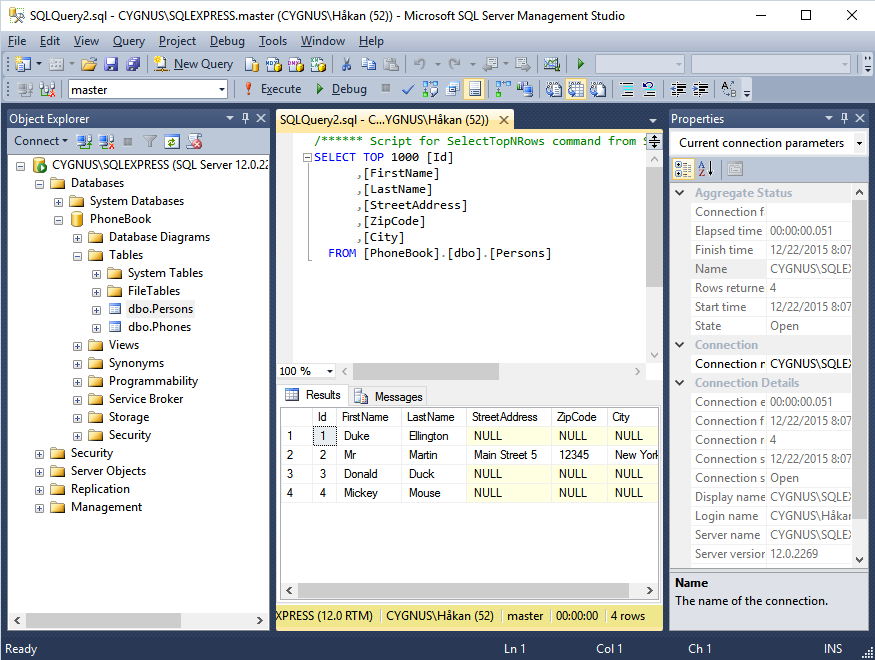
What about associating the phones with the persons? Well, in order to do that we need a 'foreign key' in the phones table. We need a new id field that will be used to store the id of the person that owns the phone. That is how the tables will be associated. So, we have to go back to the drawing-board and edit the design of the Phones table:
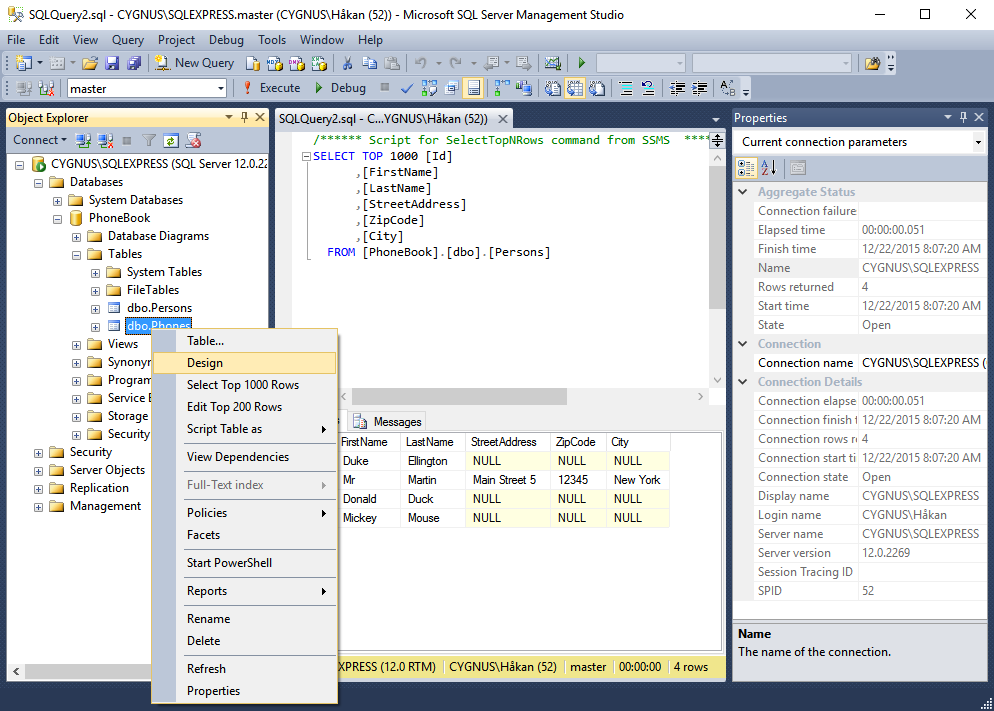
Add the field Persons_Id as the last column (that is, on the last line) and then drag it to a position under the Id field. We will not make it an automatically incremented identity specification because that would defeat its purpouse. We will programatically see to it that we enter the id of the person when adding a phone to the person. More about that when we are writing the code.
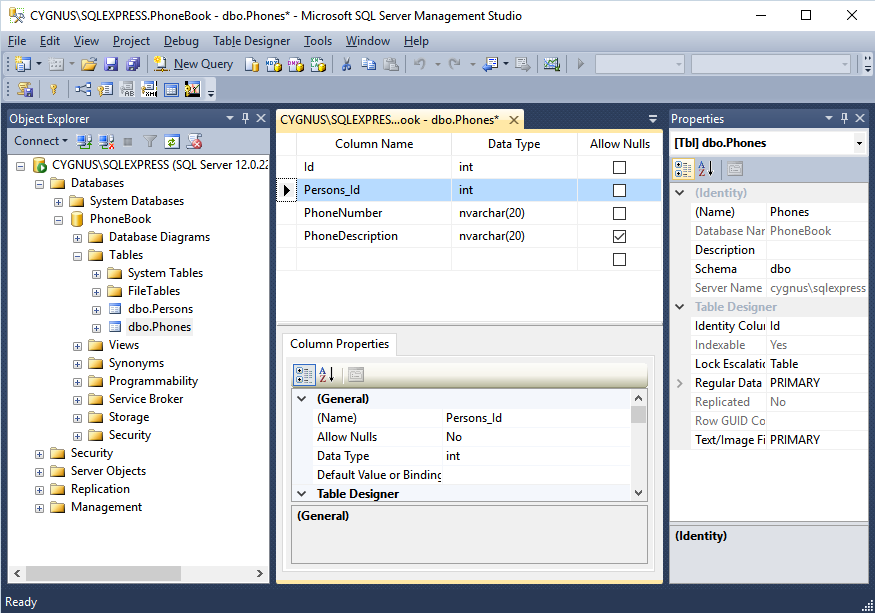
Darn! I not only forgot to add this field in the beginning. SQL server wants to prevent me from accidental data loss with the following message when I try to save the new version of the Phones table:
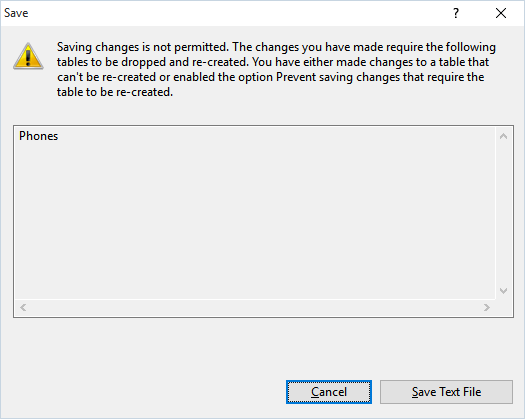
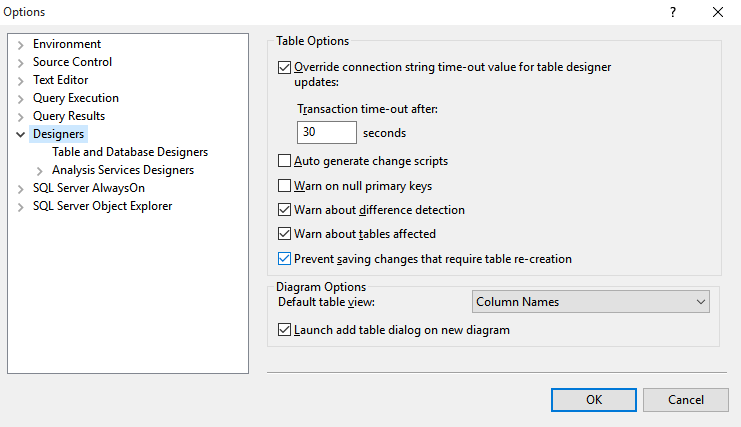
However, there is a way to override that safety measure, at our own risk, of course. Go tho the menu and select Tools -> Options...
Find Designers and uncheck the bos 'Prevent saving changes that require table re-creation', and then klick 'Ok'. We are now unsafe.
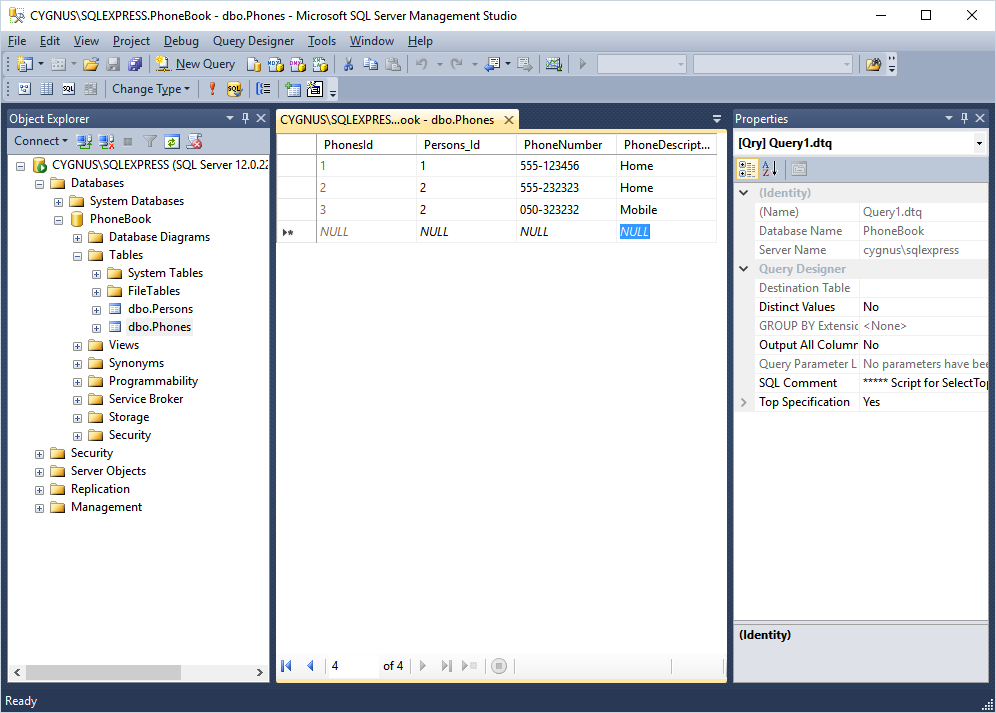
After saving the phones table, go ahead and enter some data. Did you notice that mr Ellington got the Id = 1 while Mr Martin got Id = 2? Anyway, use those numbers in the field Persons_Id to indicate what phone belongs to whom.
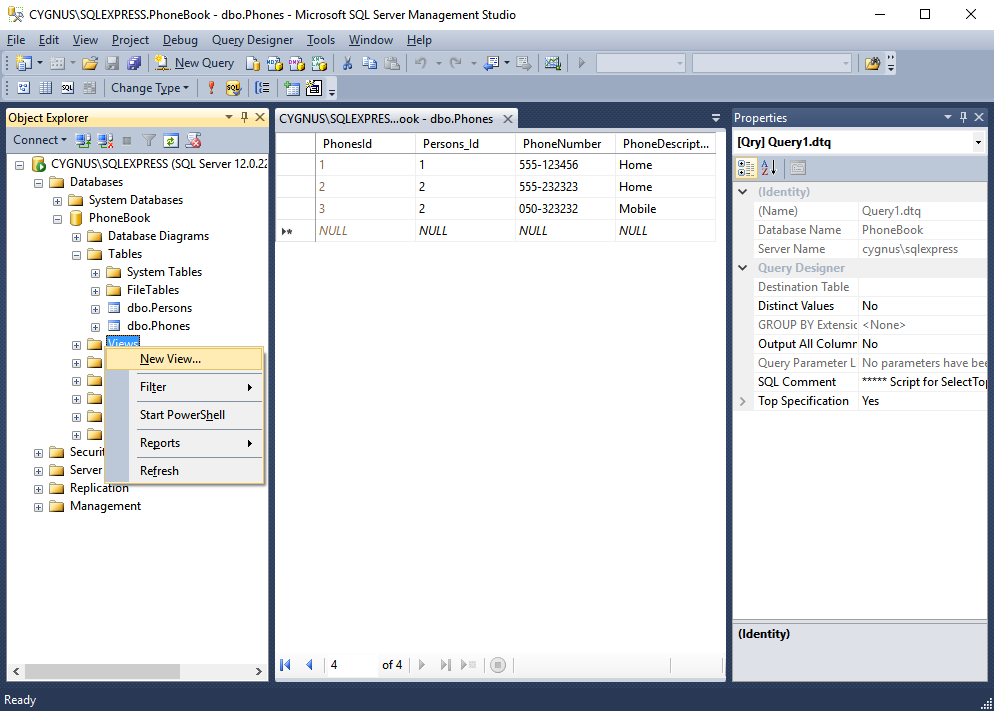
Let us connect the tables in a view. Right-click on Views in the tree-view and select 'New View...' for a real treat:
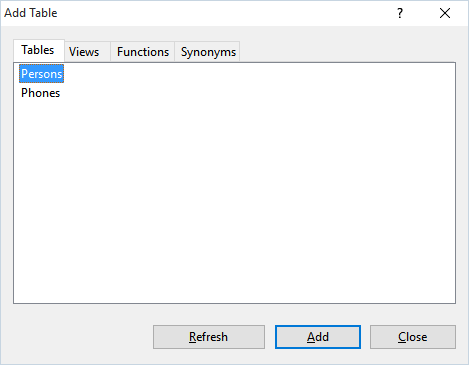
First, select both table by double-clicking them or by marking and clicking 'Add' for each one of them.
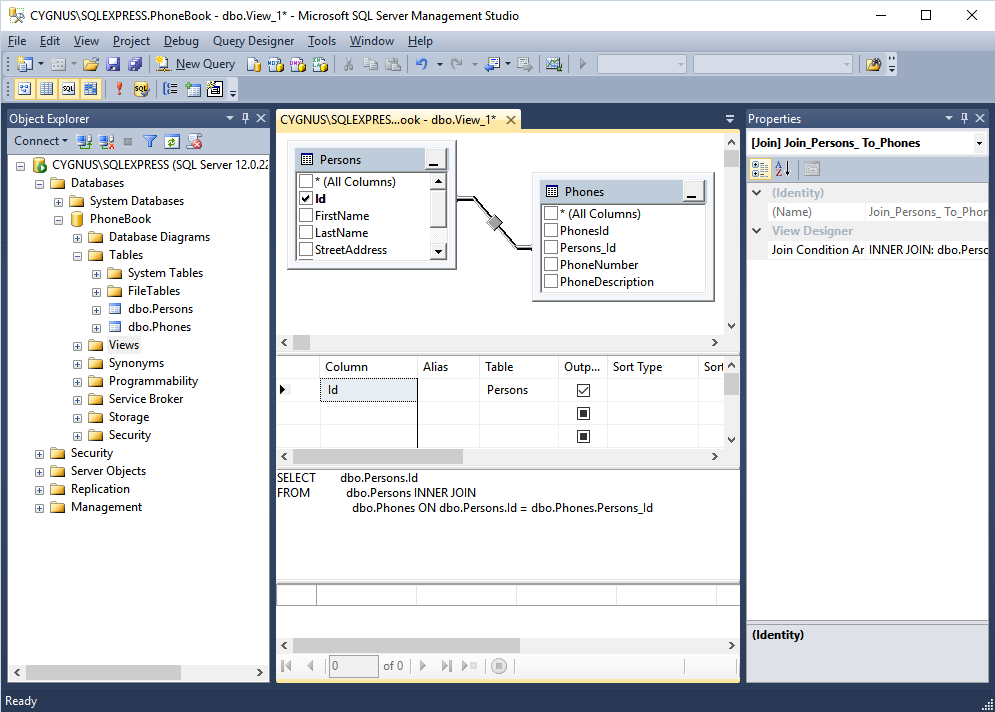
Close the 'Add Table' dialog. Rearange the tables in the top graphical part like below, and drag Persons_Id in the Phones table to the Id field in the Persons table. Note how some SQL code appears below. It is a SELECT clause as we saw when viewing the Persons table, but here we also have an INNER JOIN connecting the tables. Study the code, it makes sense. INNER means that only records that has a 'mate' in the other table will be listed.
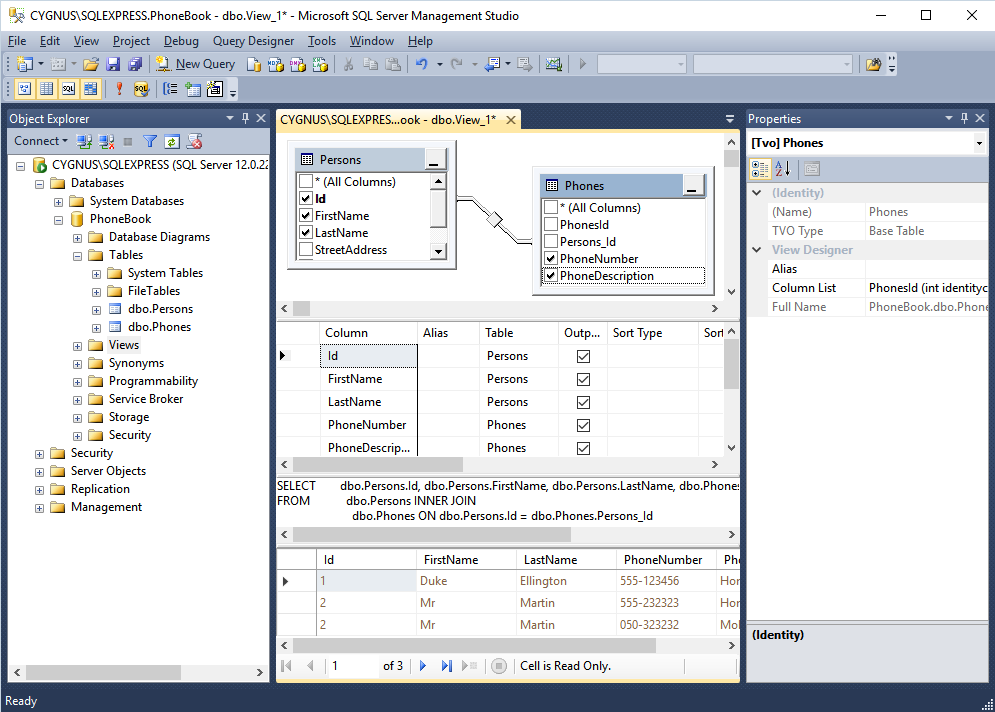
Check FirstName, LastName, PhoneNumber and PhoneDescription and then hit the red exclamation mark. We got three rows! Mr Martin appears twice because he has two phones. In a listing one might want to programmatically suppress the subsequent redundant information, but here we see that all data is available but it is not redundantly stored in the database!
What if we have persons in our databas that strange enough does not have a phone? They will not be listed. We can fix that. First enter a new person, but do not enter any data for him/her. Try the exclamation mark again. The new person will not show up.
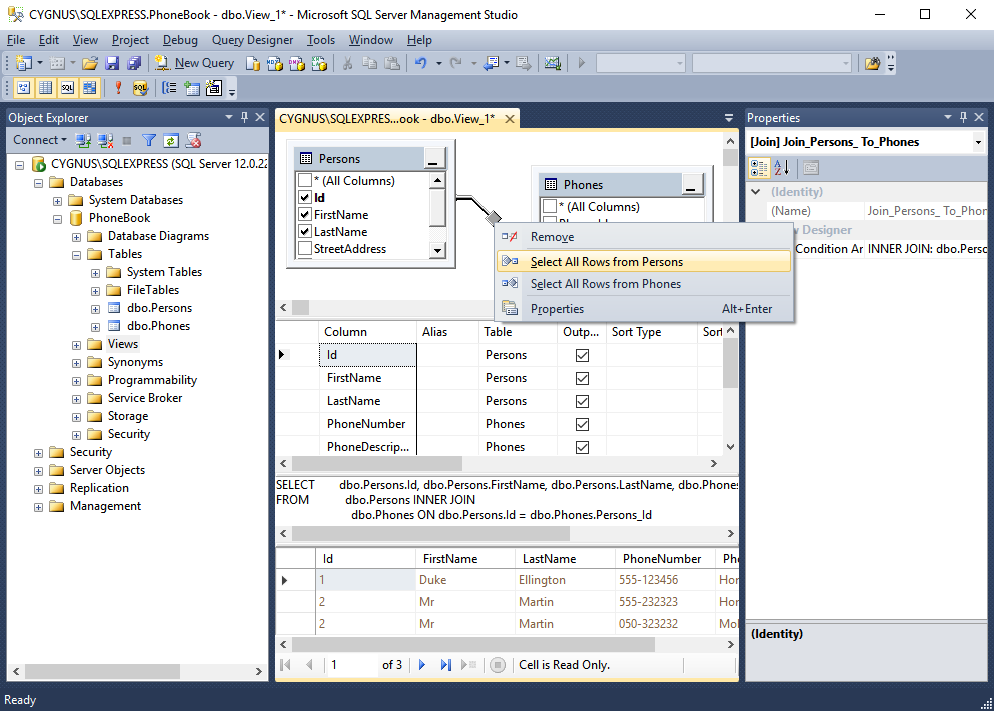
Now, right-click on the little diamond shape on the line in the graph and select 'Select All Rows from Persons'.
Note how the shape of the diamond changes to indicate that all persons will be listed. Try the exclamation mark again:
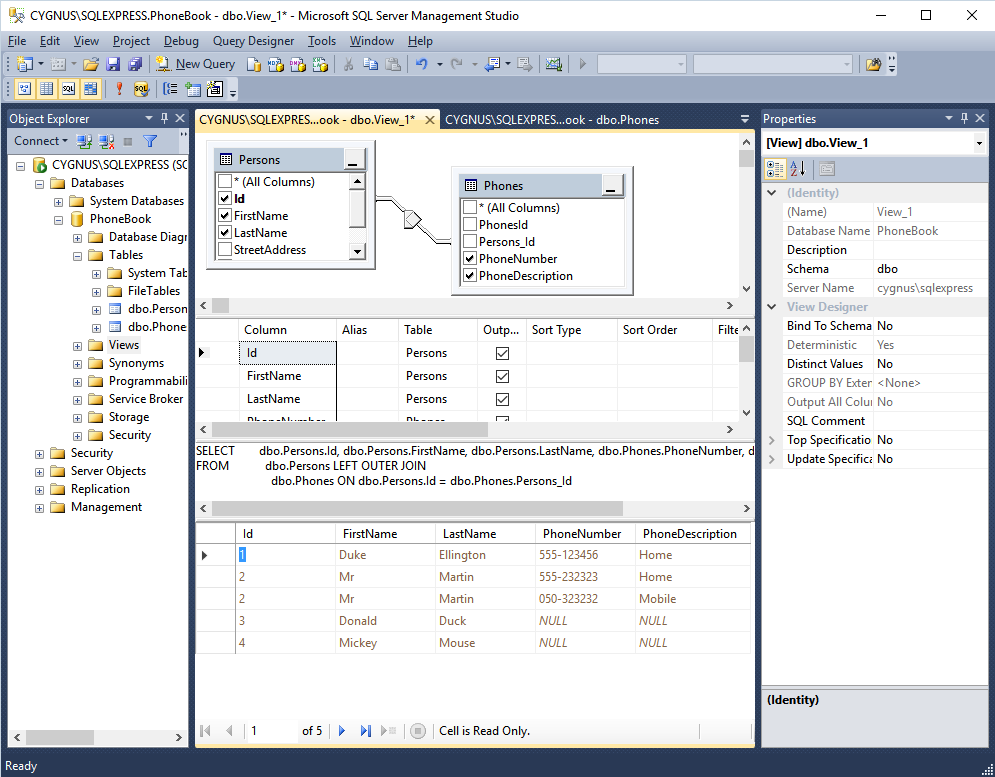
Save the view. A suitable name would be 'View_Persons_and_Phones'.
Now when we have a database, let us head over to add a database layer to our project.